How to Blur Background in Adobe Lightroom APK 2024
A good picture with a bad background is like a rose among the thorns. If you are worried about your photographs’ disturbing backgrounds and are looking for a tool to fix this issue, you are at the right place.
In this article, I will introduce you to a very trusted photo editing app, Adobe Lightroom. This app provides a complete solution to your problem and offers step-by-step guidance on how to blur backgrounds and unwanted subjects in Adobe Lightroom APK and enhance the overall beauty of your photos.
There are four methods in the Lightroom app for smoothly blurring backgrounds and adding depth to your photos. Here is step-by-step guidance on how to blur background in Adobe Lightroom and add quality to your pictures.
- Run Lightroom on your Desktop.
- Click on the library button at the right corner > Click the File button at the top left corner > You can either establish a new catalogue or utilize an existing one to arrange your photographs.
- Press the import button in the bottom left corner. Then, go to the source and select the catalogue you want to import. Finally, choose the image of the catalogue you want to blur the background.
There are three different methods for selecting the subject in Lightroom.
To find these tools, go to the Lightroom toolbar > Select Mask icon
Here are the blur tools in the Mask Section
- Brush
- Linear Gradient
- Radial Gradient
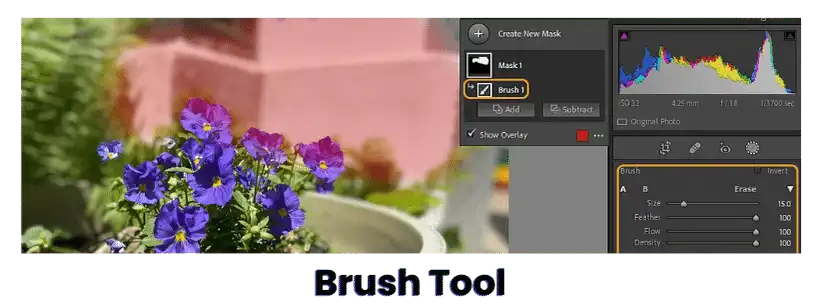
- Choose the Brush Tool from the toolbar section, situated at the top-right corner of the application.
- Adjust the brush size, density, and match according to your needs
- Select the area you want to blur with a brush tool.
- Apply Effect and adjust clarity and sharpness as per your requirement.
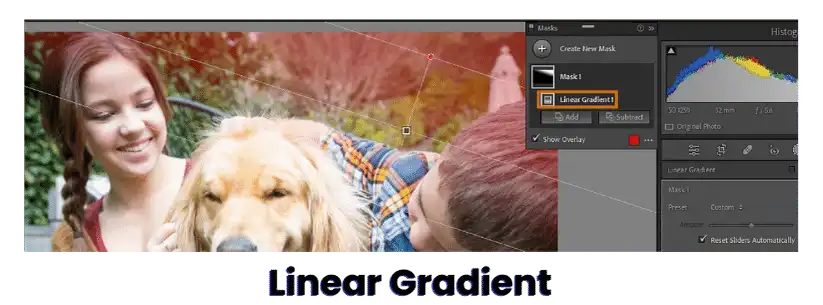
If you are not satisfied with the depth and perspective of the blur, you can use a linear gradient and adjust it to give your image a more realistic look.
- Choose the Linear Gradient tool from the toolbar and outline the subject.
- The background will be selected easily
- Now, apply the filters like clarity, sharpness, density, etc, as per your requirement.
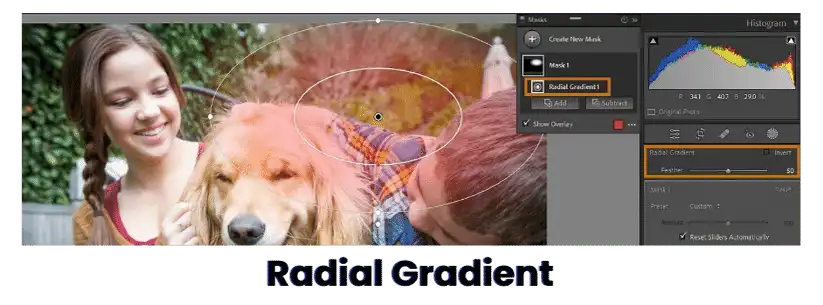
The elements in the background or surrounding your main subject in a photograph can divert the viewer’s attention. The Radial Gradient tool enables you to make localized adjustments using an oval-shaped mask. By employing this tool, you can encircle the subject with an elliptical area, allowing you to decrease the exposure, saturation, and sharpness of the areas outside the specified mask.
- Click on the Radial Gradient > outline the area surrounding the subject.
- Adjust the size of the brush.
- To adjust the settings, utilize the cursor to navigate up and down, enabling you to modify the image according to your specific requirements.
Note: Adobe also offers AI Powered Lens Blur in Lightroom MOD APK
After applying different tools and effects, if you make any mistakes, you can refine your image. For example, if you have also blurred any important part of the subject, you can use an erasing brush to remove any imperfection from the photo and give it a high-quality finish.
- The process of export is almost similar to the import process described above. First, choose the photo you want to export to develop module or Library.
- Then go to File Menu and click on the export Button
- Select the destination folder where you want to export the image
- Chose Image format (JPEG, TIFF, etc)
- Make Necessary settings, like adjust color, resolution, sharpness, watermark and quality.
- Press the Export Button, give a name to the according to your understanding, and export the image.
Steps
- Open the Lightroom app and import or capture the image you want to edit.
- Click on the masking tool located within the editing options.
- Press the “+” button to access the additional masking options.
- Choose one of the three available tools: brush, linear gradient, or radial gradient.
- Once you’ve selected a tool, start by outlining the area around the subject that you want to adjust.
- You can adjust the scale, such as clarity, brightness, intensity, and brush size, to refine the selected area according to your requirements.
- Make precise adjustments by carefully brushing or applying gradients to achieve the desired effect.
- Continue editing until you’re satisfied with the edits made to the selected area or background.
- Review the changes and fine-tune them as necessary before finalizing the edit.
- Save your edited image or export it to share or further process as needed.
Steps
- Open the Lightroom app on your iPhone and import or capture the image you want to edit.
- Navigate to the masking tool where three options appear in a line: Brush, Radial Gradient, and Linear Gradient. Select one of these tools.
- Use the selected tool to outline and select the area around the main subject where you want to apply the blur effect.
- Adjust clarity, intensity, focus, brightness, and colours according to your requirements to refine the selected area.
- After applying the desired settings, tap on the save button located at the top right corner to save the edited image. Optionally, you can also directly share the image to your mobile phone gallery.
Note: Read my complete article on Adobe Lightroom APK for iOS.
- Launch the Lightroom app on your MacBook and import the images.
- Open the masking tool at the top right corner.
- Choose the “Subject” option from the masking tools available.
- Select the subject within the image. Lightroom will automatically detect the background around the subject.
- Use the cursor to adjust texture, clarity, and dehaze by moving it left or right to achieve the desired effect.
- Fine-tune the adjustments until you’re satisfied with the look of the image.
- Please review the changes made to ensure they meet your requirements.
- Once you’re happy with the adjustments, proceed to save the edited image.
- Save the image to your desired location, ensuring that the changes made during the editing process are maintained.
After reading this article, you are at the stage where you can easily blur the background and prominently highlight the subject of your photos no matter which device you are using, whether it is Lightroom Android, PC, Mac, or iPhone. Adobe Lightroom also offers a direct background tool where you can highlight the focus of the image by applying blur, adjusting Bokeh, and giving the photos a creative look.
Can I blur background in Adobe Lightroom APK (Mobile)?
Yes, you can blur the background in Lightroom Android and iOS.
Why should I use Lightroom to blur the background?
Lightroom is an all-in-one app that provides all essential tools related to blurring backgrounds. You can easily blur background in Adobe Lightroom with very simple steps.
What is Bokeh, and what are the benefits of Bokeh?
Creating “bokeh,” which involves blurring the background, enhances the overall visual appeal of your images by highlighting your subject, eliminating distractions, and enhancing the overall visual appeal.
Can I remove or blur unwanted subjects from my Photos by using Adobe Lightroom?
Yes, you can use Healing Brush and Clone to remove unwanted elements from your photos.

