How to Import Presets in Adobe Lightroom (Desktop, Mobile) 2024

Presets are one of the premium and highly demanding features of Adobe Lightroom. They are pre-made settings of filters that help you alter your photos and videos very quickly. With Adobe Lightroom presets, you can effortlessly enhance the beauty of your photos and get desired results in minimal time, no matter what you are using: Lightroom CC, Lightroom Classic, or Lightroom Mobile (Android, iOS).
In this article, I will explain how to install and import Presets in Adobe Lightroom with simple steps so that you can speed up your workflow.
Adobe developed software, Lightroom Classic, Considering the Needs of Professional photo and video editors. LrC is a desktop version of Adobe Lightroom; this software is only compatible with PCs or Macs. It supports XMP file import presets.
Here are three simple methods to import presets in Adobe Lightroom Classic.
- 1 Drag and Drop Presets
- 2 Use the Import Preset Option
- 3 Import Presets by Preference
- Firstly, Download the Lightroom Presets of your choice and save them on your MAC or PC
- Windows users will open ‘File Explorer’; if you’re a MacOS user, you will open ‘Finder’ and go to the folder where you saved your presets.
- Select the presets you wish to import into Lightroom Classic.
- Drag the selected preset files into the Lightroom Classic window.
- Lightroom Classic will automatically detect the imported preset files and open a new window titled “Import Presets.”
- Make sure the “Import” option is selected within the dialog box, and then click “Import.”
- You can organize your imported presets by creating folders within the “Presets” panel.
- Your imported presets will now be accessible in the “Presets” panel under the category “User Presets.”
- To apply a preset, click on the specific preset, and the Lightroom Classic app will automatically use it.
- Go to lrmap.com and download the presets .XMP format.
- Open Lightroom Classic and navigate to the “Develop” Module located in the top-right corner.
- In the Develop module, locate the “Presets” panel on the left-hand side. If it’s not visible, click the small triangle to expand it.
- Right-click on the “Presets” panel and select “Import.”
- Optionally, you can organize your imported presets into folders for easier access. Right-click within the “Presets” panel and choose “New Folder.” Name the folder, and drag presets into it.
- Your imported presets will now be displayed in the “Presets” panel under the “User Presets” section.
- To apply a preset to a photo, click on the preset name. Lightroom will automatically apply the presets adjustments to the selected image.
- Enjoy the transformed look of your photo with the applied preset.
- Open the Lightroom Classic app on your computer.
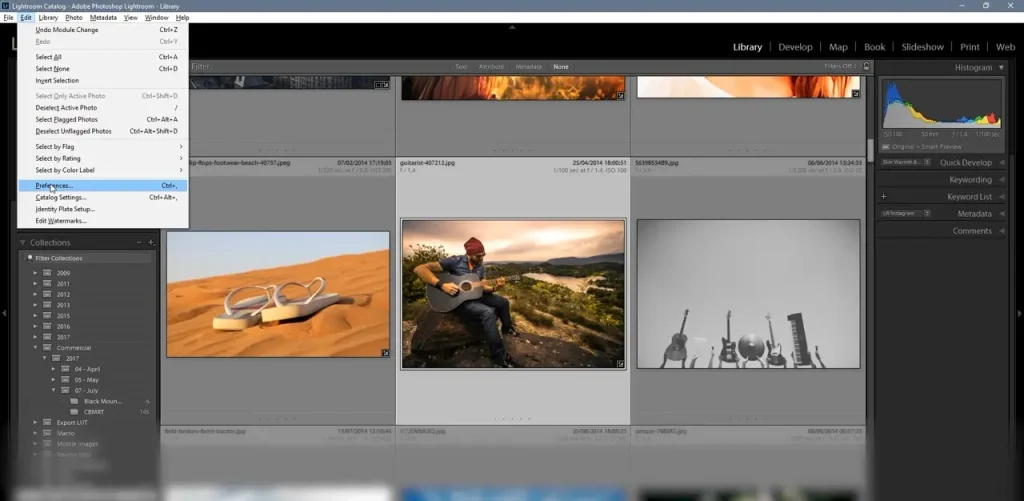
- Move your mouse cursor to the top toolbar and click on the “Edit” option.
- Within the “Edit” dropdown menu, select “Preferences”.
- In the Preferences dialog box, navigate to the “Presets” tab.
- Within the Presets tab, locate and click on the option labeled “Show Lightroom Develop Presets.” This action will open the folder containing the Lightroom Develop Presets on your computer.
- You can now further adjust settings by exploring the different options available within the Lightroom Develop Presets folder.

There are three methods to install and import Presets in Adobe Lightroom Mobile, Android, and iOS.
- Sync with Lightroom Desktop (LrC)
- By using the Import Preset Option
- Import DNG File
If you want to use the same presets on Lightroom Classic and Lightroom CC (Mobile), this method is for you. In this method, you can synchronize your presets from Lightroom Classic to Lightroom CC with Adobe Creative Cloud. By synchronizing the app with LrC by Creative Cloud, all the data, including presets, sync with Lr CC and are ready to use.
- Download and open the Lightroom app on your Android or iOS mobile device.
- Tap on “New Project” to start a new editing project.
- Upload the desired image or video that you want to edit and apply presets to.
- Look for the “Presets” icon at the bottom of your phone screen and tap on it.
- In the top right corner of the app, tap on the three dots to access more options.
- Select “Import Presets” from the menu that appears.
- Wait for a few seconds for a new window to open.
- A pop-up window will appear; navigate to the folder where your presets are stored and select your favorite preset.
- The imported presets will now appear in the presets section, ready to use.
- Tap on the respective preset you want to apply, and Lightroom will start processing it. Wait a few seconds for the preset to be properly applied.
You can also save the preset for later use and share it with other Lightroom users through the Lightroom community. If you want premium presets unlocked you can download Lightroom MOD APK.
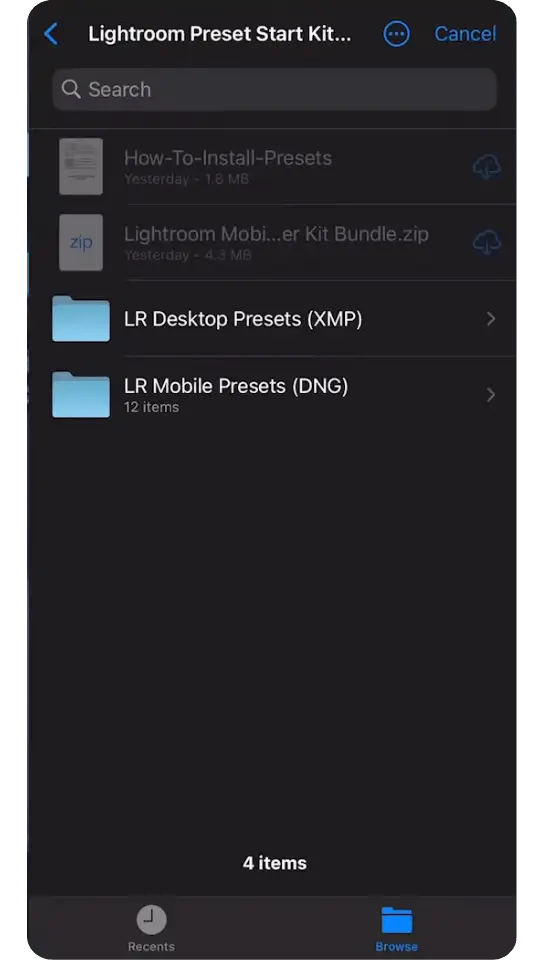
- Download the presets you want to use in DNG format.
- Open Lightroom Mobile and tap on the “+” or “Add a photo” button.
- Select “From Files” from the menu that appears.
- Choose the folder where you downloaded the DNG files.
- Select all the preset files you want to import and tap on “Add” or “Import”.
- Optionally, save these presets for future use by tapping on the three dots and selecting “Save preset.”
- Tap on the name of the saved presets to apply them automatically to your images or videos.
- Save the edited media file or continue editing further as needed.

Once you’ve successfully imported your presets into Adobe Lightroom, organizing them efficiently is key to maintaining a smooth workflow. By categorizing presets and utilizing Lightroom’s built-in tools, you can quickly access the exact look you want for your photos without wasting time scrolling through endless lists. Here are some advanced tips to help you organize your presets more effectively
Organizing presets into custom folders is a great way to keep everything tidy. You can create folders based on the type of photography (e.g., Portrait, Landscape, Wedding) or the style of edits (e.g., Vintage, Black & White, HDR). This way, you can quickly find the preset that best suits your current project.
Renaming your presets with descriptive titles can save you time. Instead of generic names like “Preset 1,” opt for names like “Bright & Airy” or “Moody Sunset” to give you a clear idea of what each preset does at a glance.
In Lightroom Mobile, you can mark certain presets as favorites by tapping the star icon. This feature is especially useful if you regularly use a handful of presets and want quick access to them without searching through your entire library.
Regularly back up your custom presets, especially if you’ve invested time in creating or fine-tuning them. You can export your presets to a secure cloud storage service or an external hard drive, ensuring you don’t lose them in case of technical issues.
Adobe Creative Cloud allows you to sync your presets across multiple devices. Whether you’re editing on your desktop or mobile, you can have access to the same presets, ensuring consistency in your edits, no matter where you are
After reading this article, I hope you are able to import Lightroom presets. You can follow the instructions and import Lightroom presets with easy and simple methods whether you are using Adobe Lightroom Classic (desktop) or Lightroom Mobile (Android, iOS). You can also adjust your own presets by applying a set of filters and saving them to apply to more photos and speed up your work.
Can I import presets in Lightroom CC?
YES, There are three methods to import presets to Lightroom CC, which are mentioned above.
What is the difference between Lightroom Classic and Lightroom CC?
Lightroom Classic is for desktop users; mostly professional photographers use it. On the other hand, Lightroom CC is for everyone; beginners and professionals can both comfortably use it.
What is the difference between Lightroom Classic and Lightroom CC when importing photos?
The import processes in Lightroom Classic and Lightroom CC differ. Here’s a concise breakdown:
Lightroom Classic:
- Utilize the “Import” dialog.
- Import photos from your computer, camera, or external drives.
Lightroom CC:
- Experience a simpler import process.
- Enjoy seamless integration with cloud storage.
- Easily import and access photos across devices.
Are Lightroom presets free to use?
Yes, many presets are free to use, but if you want to use premium presets, you need a paid subscription to Adobe Lightroom.
Can I edit presets in Lightroom?
Yes, you can edit presets by trying different combinations of presets and creating your own preset.


